While writing up the code within WFMC for the Vanilla WotR rules it became very obvious very quickly that the rules for the basic movement within WotR require a lot of computations to allow the expended Move Value to be calculated. I'm going to go through some of what was required within this post - and hopefully it will clear up any confusion about the way that it works within the rule set. In fact, I suspect that a lot of players actually take for granted the amount of work required to determine the actual move distance during the Move Phase of the game (and because of such do a very sloppy job at it and take full advantage of the "forgive others during the Move Phase advice within the book).
To start, let’s consider a formation in 3x2 Configuration comprised of 4 Infantry Companies that do not change configuration, but simply translate and rotate. We will calculate the Expended Move Value under the Vanilla WotR Rules and show how this is accomplished. This is technically the “simple case”.
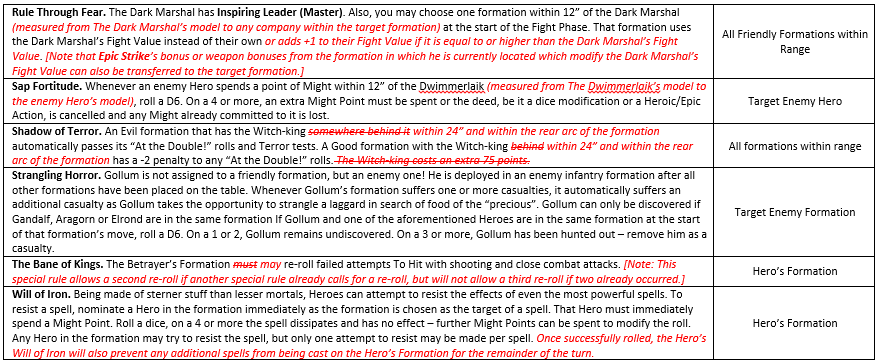
Here is how the rules read in the rulebook for measuring distance under translation and rotation:
Here is the section on Measurement Etiquette:
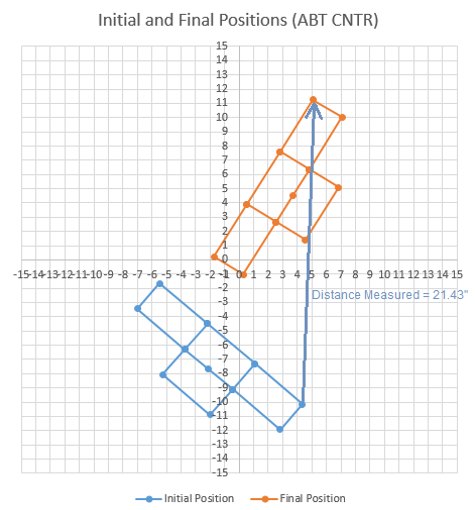
Here is our goal – we want to find the corner of the company within the formation that has moved the greatest distance and use that as our Expended Move Value for the entire formation:
Notice that everything is measured with respect to a Cartesian Coordinate Axis, and the only thing that matters when determining the Expended Move Value is the corner of one of the companies within the formation that traversed the greatest distance.
The first natural question is: How do you know which corner has traversed the greatest distance? And the short answer is: You don't unless you measure each of them individually, compare them, and determine the maximum.
Then of course the follow-up is: Well, if I’ve already moved all of my Companies within my Formation and I’ve moved “too far” … how do I know where to return them back to accurately to re-do the movement?
EXACTLY!
Let’s go through the math necessary to calculate the maximum traversed distance for the formation to show you how it is getting calculated it in WFMC (and how each of us should be calculating it during the Move Phase when we are playing an actual game).

Clear as mud? If that does not make you want to go break out all the miniatures and play a game – I don’t know what will!
This quickly becomes a ton of information to keep track of for a single Move Phase of a single Formation, so in order to ensure that the numbers I got were correct (and to validate the output from WFMC) I put together a spreadsheet to help to calculate all the values.
Let’s see if adding some pictures of what is actually going on will help to clarify things a little more.
Formation Width, # of Companies & Formation Type are the initial Inputs in order to look up within the database the offsets for the corners or each company within the formation.
Here is the Formation that is comprised of 4 Companies in 3x2 Configuration at its Initial Position relative to the Coordinate Axis Frame. We have been identifying this as the “Baseline Position” within WFMC.
The “Initial Position” (i.e., Baseline Position) is determined relative to the (0, 0) point of the Coordinate Axis Frame by means of the 3 sliders: Rotation Angle, X Position, & Y Position.
OK, I need a short break - but I want to get this posted. I'll break this Part 9/11 into a Part 9a and Part 9b and continue more with this as I have time over the next few days .... stay tuned ... you can see that this is going to be great, right?
LINKS TO OTHER PARTS OF THE WFMC PROGRESS SERIES
Help make WFMC Mobile get released to the Apple App Store with a donation!
LINKS TO OTHER PARTS OF MOVEMENT TYPES AND LIMITS SERIES
- Movement Types and Limits Series - Reconfiguration Movement of Cavalry Formations Comprised of 2-3 Companies [Part 11/23]
- Movement Types and Limits Series - Reconfiguration Movement of Cavalry Formations Comprised for 4 Companies [Part 12/23]
- Movement Types and Limits Series - Reconfiguration Movement of Cavalry Formations Comprised of 5 Companies [Part 13/23]
- Movement Types and Limits Series - Reconfiguration Movement of Cavalry Formations Comprised of 6 Companies [Part 14/23]
- Movement Types and Limits Series - Reconfiguration Movement of Cavalry Formations Comprised of 7 Companies [Part 15/23]
- Movement Types and Limits Series - Reconfiguration Movement of Cavalry Formations Comprised of 8 Companies [Part 16/23]
- Movement Types and Limits Series - Reconfiguration Movement of Infantry Formations Comprised of 9 Companies [Part 17/23]
- Movement Types and Limits Series - Cavalry Movement Example 1 from Page 33 of WotR Rulebook Analysis [Part 18/23]
- Movement Types and Limits Series - Cavalry Movement Example 2 from Page 33 of WotR Rulebook Analysis [Part 19/23]
- Movement Types and Limits Series - Cavalry Movement Example 3 from Page 33 of WotR Rulebook Analysis [Part 20/23]
- Movement Types and Limits Series - Reconfiguration Summary of Cavalry Formations by Company Size [Part 21/23]
- Movement Types and Limits Series - Cavalry Restrictions of Reconfiguration by Formation Name Summary [Part 22/23]
- Using WFMC to Verify Movement Examples [Part 23/23]
LINKS TO OTHER PARTS OF THE WFMC MOBILE ART SERIES